
Published October 26, 2026 06:00AM
For this article, retired pro triathlete and Triathlete contributor Emma-Kate Lidbury spoke to strength coach and former pro Dede Griesbauer about why this stability ball workout is so effective for triathletes.
Here’s the thing about strength training for triathletes: Almost nobody skips it because they don’t believe in it. They skip it because of the drive to the gym or the 90 minutes that don’t exist between that threshold bike workout and school pickup.
So what if we make life a little easier and remove some of the barriers to getting strength done?
This routine does exactly that and requires one piece of equipment – an exercise ball – and a patch of floor about the size of a yoga mat. No need for dumbbells, a bench, a gym membership, or the drive there. You can pick up an exercise ball for about the same price as a mid-range pair of goggles; it can fit into most any suitcase; and it might just help you find every stabilizer muscle you’ve quietly neglected since your last off-season strength block.
The benefits of the exercise ball
A stability ball is, by design, unstable. That’s the entire value proposition. It offers the following benefits:
Core and spine stability
Every exercise here demands you hold a neutral spine against something actively trying to move you out of it. Former pro triathlete turned strength coach Dede Griesbauer points out that this pays off in two places triathletes care about: run efficiency, and the ability to hold a stable position in the aerobars.
Balance and symmetry
With an exercise like the rear foot elevated lunge (below), Griesbauer notes this forces each leg to work independently, which may reveal the left-right discrepancies a bilateral squat lets you hide. This matters for power balance on the bike and for not favoring one side on the run, which can help reduce injury risk.
Efficiency
Almost every movement in this routine trains multiple muscle groups at once. Griesbauer’s summary: It offers good “bang for the buck” with minimal equipment, minimal space, and minimal setup.
Who’s this workout for?
- Anyone who trains exclusively on machines: Seated machines are safer precisely because they do the stabilizing for you. As Griesbauer puts it, “They provide the stability for you as you typically only move the weight in one direction.” This routine will expose the stabilizers that those machines don’t ask you to work and then help to develop them.
- Anyone with a weak core: If holding a neutral spine is a struggle, the anti-extension work here is the fix. One caveat: The abdominal rollout exercise assumes an advanced baseline of core strength. If it feels like too much to begin with, shorten the range, or start with the ball walk-out instead.
- Travelers and home-gym minimalists: Most hotel gyms have a ball. If yours doesn’t, Griesbauer notes that many of the elevated exercises can work off a chair or couch.
- Advanced beginners: If you’re comfortable with bodyweight squats and floor push-ups but not ready to move to heavy loading, this is a great next step.
How to add this workout to your training week
Griesbauer advises adding strength work to your hard days, not because it’s pleasant to stack lifting onto a threshold run, but because the alternative – sprinkling it across easy days – erodes the recovery that those days are designed to deliver.
“Make your hard days hard so that your easy days can be easy,” she says.
That’s the ideal. Griesbauer is also clear about what “ideal” might look like for an age-grouper with a job.
“Not everyone will have time to do their hard bike or run session AND make time for strength on the same day,” she says. “The good news is that this session isn’t heavy loading. These are good basic movements, so if you are time-crunched, adding them wherever you can is better than not doing them at all.”
Two sessions a week is the target, but once isn’t a failure. “Some is better than none,” Griesbauer says, “so if you can only do it once? Get it done once.”
How to tackle this workout
Start with a single pass through all nine exercises (which should take approximately 10-12 minutes).
Once one round stops feeling like work, add a second. Then, if time allows, add a third. Three circuits should take you about 30-35 minutes and is plenty of stimulus for a routine that isn’t loading you heavily. Rest 30 to 60 seconds between exercises and a couple of minutes between rounds.
Progress through the workout in the order listed. It moves between lower body, core, and upper body so nothing fatigues to failure.
The exercise ball routine
Rear Foot Elevated Lunge
Stand on your right foot with your left leg extended behind you and the top of your left foot resting on the ball. Bend your right knee until your right thigh is parallel to the floor, keeping your torso upright and your weight on your heel. Now press your heel into the floor and return to the start position. Complete 10 repetitions and then repeat the exercise with your left leg.
Reverse Crunch
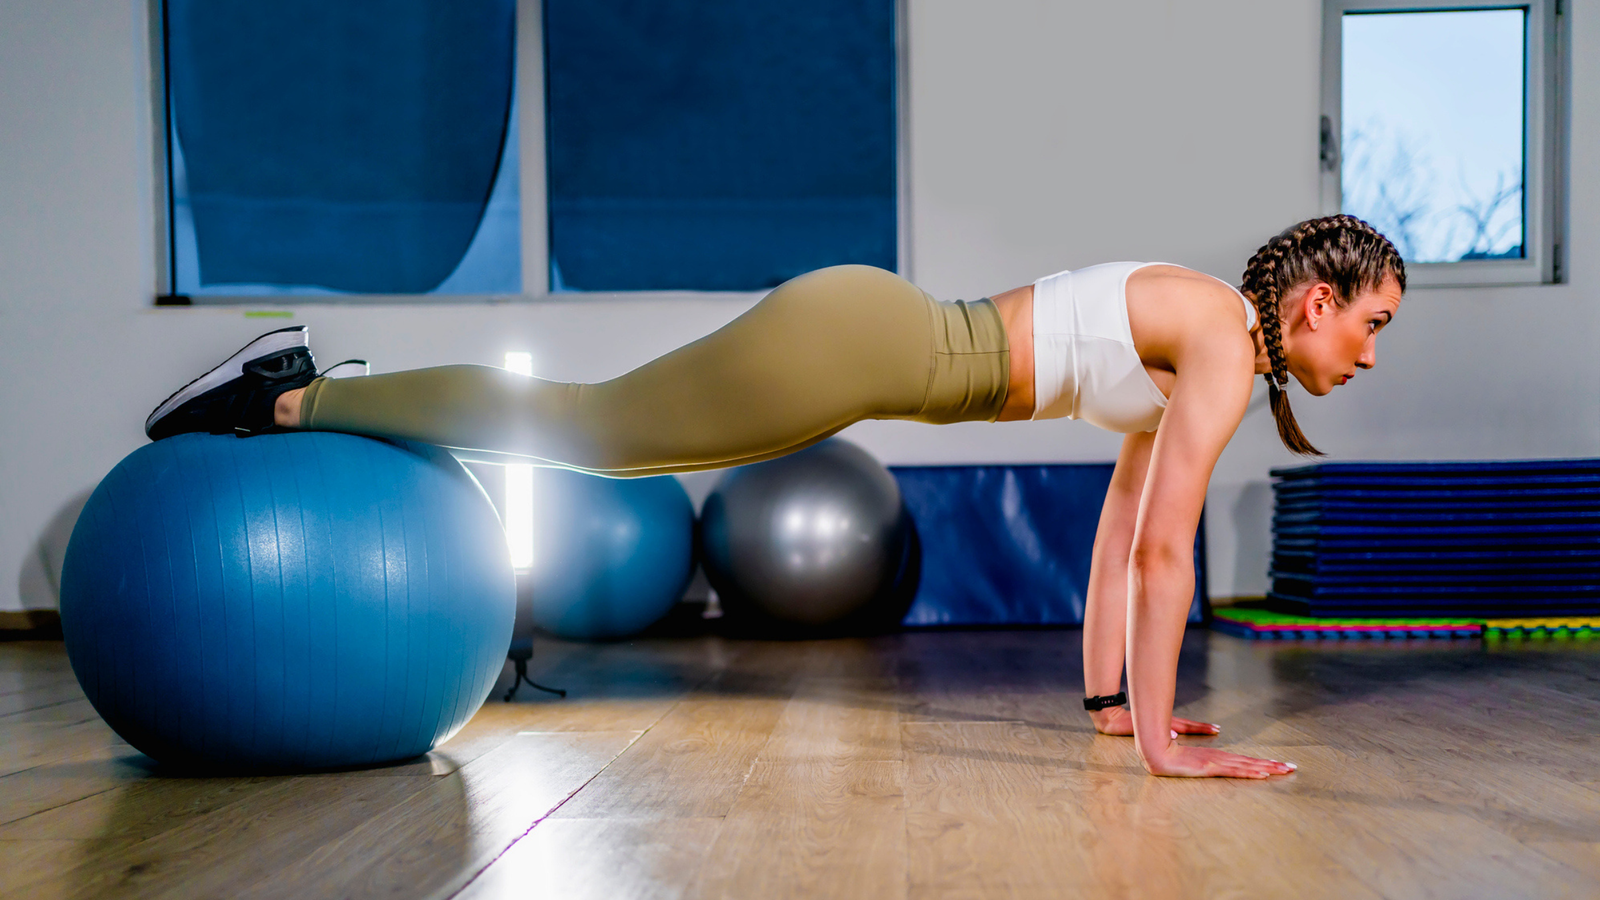
Begin in a prone position with the tops of your feet resting on the ball, your palms on the floor underneath your shoulders, and your body forming a straight line. Now contract your stomach muscles, bend your knees, and roll the ball toward your chest. Pause briefly and roll the ball back until your body forms a straight line again. Complete 12 repetitions.
Ball Push-up
Assume a modified push-up position with your feet together, your body forming a perfectly straight line and your palms positioned slightly more than shoulder-width apart on the ball. Bend your elbows and smoothly lower your chest to within an inch of the ball. Immediately press back upward to the start position. If you have difficulty doing a full push-up, do a half push-up, bending your elbows only to 90 degrees before pressing upward. Complete 10 repetitions.
Hamstring Curl
Start in a bridge position, face up, with your head and shoulders on the floor and your heels resting on top of the ball, your body suspended in a straight line between these points. Contract your hamstrings and roll the ball toward your butt. Pause briefly and extend your legs, rolling the ball back to the starting point. Don’t let your hips drop. Complete 12 repetitions. If this exercise is too easy, do a single-leg version, elevating one foot above the ball and pulling the ball toward your butt with the other leg.
Abdominal Rollout
Kneel on the floor facing the ball, lean forward slightly, and place your forearms on top of the ball. Pull your belly button toward your spine. Slowly roll the ball forward by extending your forearms out in front of you and allowing your body to tilt toward the floor. Concentrate on maintaining perfect alignment of your spine. Stop just before you’re forced to arch your back. Hold this position for a two-count and then return to the start position, exhaling as you do so. Complete 12 repetitions.
Ball Walk-out
Lie facedown on the ball with your palms on the floor. Begin with the ball supporting your pelvic area. Now use your hands to drag your body forward over the ball until it is underneath the tops of your feet, keeping your body in a straight line. Pause briefly and roll back to the start position. Complete 10 repetitions.
Elevated Push-up
Assume a modified push-up position with your palms on the floor, the tops of your feet resting on the ball, and your body in a perfectly straight line between them. Bend your elbows and lower your chest toward the floor. Go as far as you can without strain; it’s OK if it isn’t very far. Now press back to the start position. Complete 10 repetitions.
Bridge Heel Raise
Lie face up with your upper back supported by the ball, your feet flat on the floor about 12 inches apart, your knees bent and your body forming a “tabletop” from knees to chest. Contract your calf muscles and raise your heels off the floor without allowing your hips to sag. Now lower your heels back to the floor. Complete 12 repetitions. If this exercise is too easy, do a single-leg version, first crossing your left ankle over your right knee and then doing the reverse.
Lat Pull
Get into a plank position with your palms on the floor underneath your chest and the ball supporting your shins. Keeping your arms straight, press the heels of your palms into the floor and push your body backward so that the ball rolls up under your thighs. Go as far as you can and then pull your body in the opposite direction until you’re back in the start position. Complete 12 repetitions. If this exercise is too easy, start with the ball under the tops of your feet.
Proceed with Caution
Instability is the point, which also means this routine isn’t universally appropriate. Griesbauer flags a few pointers worth knowing before you start. Note that none of these are a reason not to train. They just require you to adapt or swap movements if needed.
If you have a cranky lower back: The abdominal rollout generates high spinal extension and shear force if your core gives out mid-rep, which can be a genuine problem for anyone with disc history. The reverse crunch can pull you into loaded lumbar flexion if control slips, and a hamstring curl performed with dropped hips will arch and cramp the low back.
If you have “shoulder history”: Push-ups on a moving ball tax the rotator cuff hard, and the ball walk-out places prolonged, shifting load on the shoulder joint. Skip both if you’ve dealt with instability or impingement.
If you have wrist issues: The ball’s spherical surface forces the wrists into deep extension while the weight moves under you. Elevated push-ups shift more bodyweight forward onto the same joints.
If you have knees and hip flexor problems: The rear foot elevated lunge loads the front knee in deep flexion and stretches the trailing leg aggressively, which can be enough to tip the pelvis if your hip flexors are tight. Tight hip flexors will also hijack the reverse crunch from the lower abs.
If you have cramp-prone calves and hamstrings: The bridge heel raise fires the calves while the hamstrings are already shortened, which is a reliable spasm trigger. The hamstring curl frequently cramps athletes with weak hamstrings on the concentric.
If you have compromised balance: Any single-leg work raises fall risk. Have a wall or chair within reach if you feel you might need it.