

Sticky rice cake with red bean paste belongs to the same texture family as Japanese daifuku mochi and Chinese coconut mochi, where a chewy rice-flour dough wraps around a sweet filling. The difference is that mochi is steamed first and then shaped, which takes more skill, while this cake is shaped first before being pan-fried, making it much easier for beginners. The sesame-coated crust and the pan-fried texture set it apart from the pumpkin dough version I make in my Chinese pumpkin cake, which uses the same wrapping technique with a different dough.
This is one of my favorite childhood snacks. My mom made these often when I was growing up, and I would stand next to her at the counter with a small piece of dough in my hands, learning how to press a well in the middle and pinch the edges closed around the red bean paste. My son is old enough to do the same thing at my counter now, and rolling the sticky dough balls and pressing them into a bowl of sesame seeds is a job he takes very seriously.
Preparing these is actually pretty easy, I simply portion the red bean paste into balls, mix the glutinous rice flour dough by hand until it comes together like soft clay, then wrap and pan-fry the cakes in a thin film of oil. The dough is much friendlier than any bun or dumpling dough because there is no gluten to worry about, no rest time, and no rolling pin. So, I can’t wait for you to try them and let me know if they become your new favorite dessert.

Ingredients
These are all the ingredients I use to make this decadent sticky rice cake with red bean paste recipe:

Glutinous rice flour: I use Erawan glutinous rice flour, a Thai brand that is easy to find at Asian markets. Erawan is milled from long-grain glutinous rice, which gives the cakes a firmer chewier texture and a crisper pan-fried surface. If I use a Japanese brand instead, the flour is usually milled from short-grain glutinous rice (sometimes labeled mochiko) and needs slightly less water to reach the same soft-clay texture.
Water: I add the water gradually rather than dumping it in at once so I can judge the dough by hand as it comes together.
Red bean paste: I use my homemade red bean paste for the filling because the sugar level and the coarse bean texture are calibrated for pastries like this one. Store-bought red bean paste from a Chinese or Japanese market also works, though it tends to be sweeter than the homemade version.
White roasted sesame seeds: I coat one side of each cake in sesame seeds before pan-frying. The sesame layer keeps the dough from sticking to the pan and adds a nutty flavor to the crust.
Vegetable oil: I shallow-fry the cakes in just enough oil to coat the bottom of a nonstick skillet. Traditionally these are deep-fried, but the shallow-fry version is lighter and just as good.
How to Make
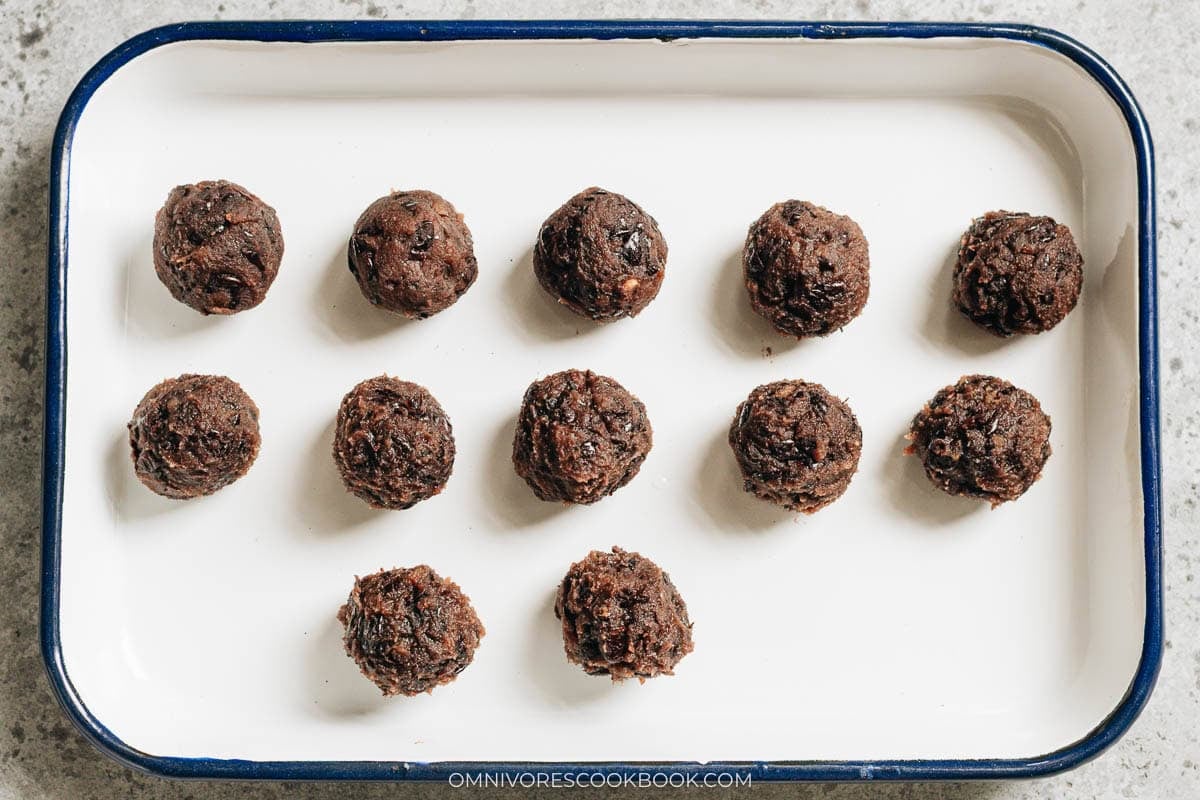
1. Portion the red bean paste: Use a medium cookie scoop to portion out 12 scoops of red bean paste, about 2 tablespoons per scoop. Roll each portion into a ball and set them aside on a plate.
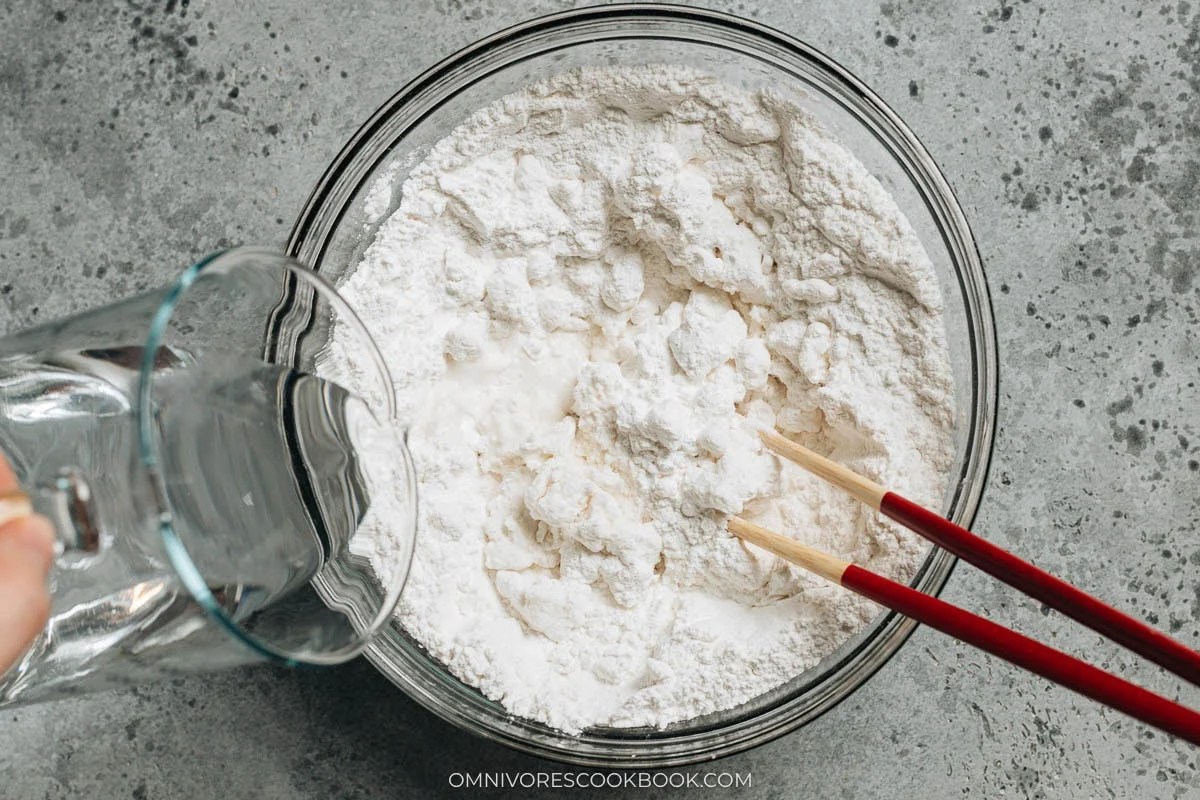
2. Mix the dough: Add the glutinous rice flour to a large bowl. Gradually pour in the water in 4 to 5 additions, stirring with a fork after each addition until the water is fully absorbed. The dough should come together with no dry flour remaining and no runny wet spots.
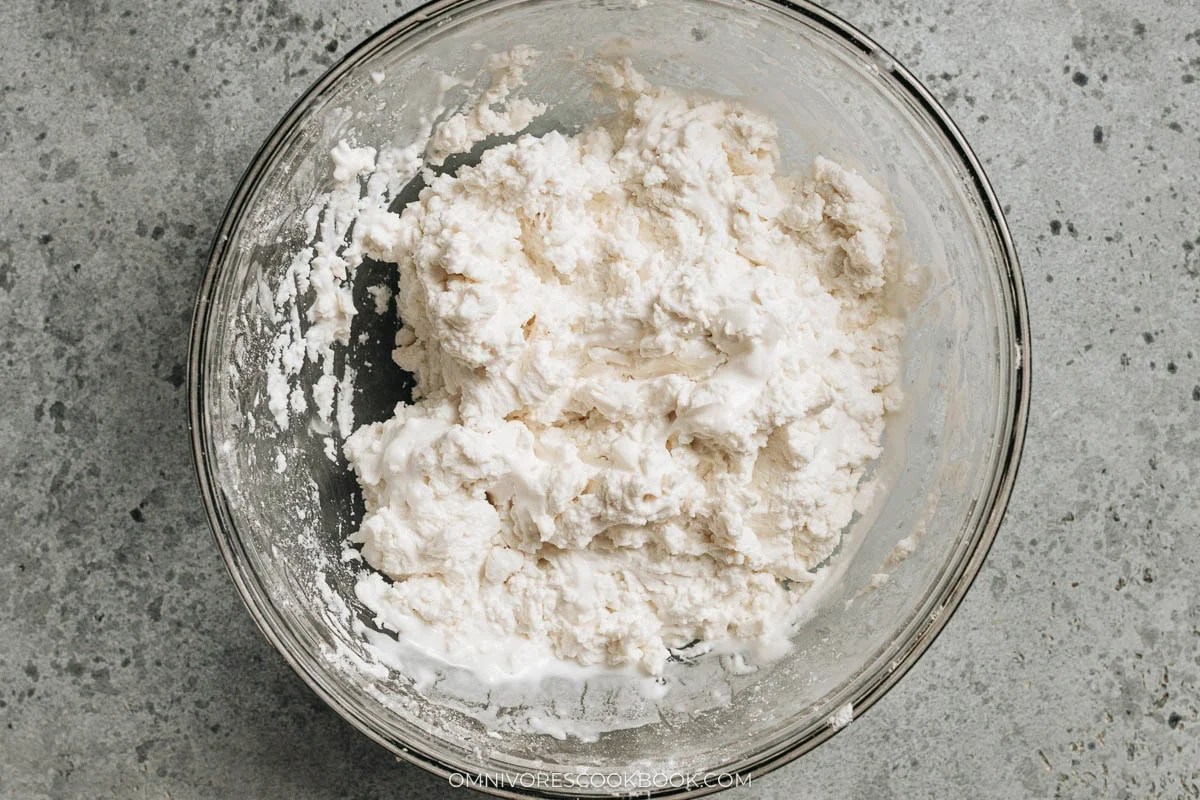
3. Adjust: If the dough is too soft to handle, mix in more glutinous rice flour, 1 tablespoon at a time.
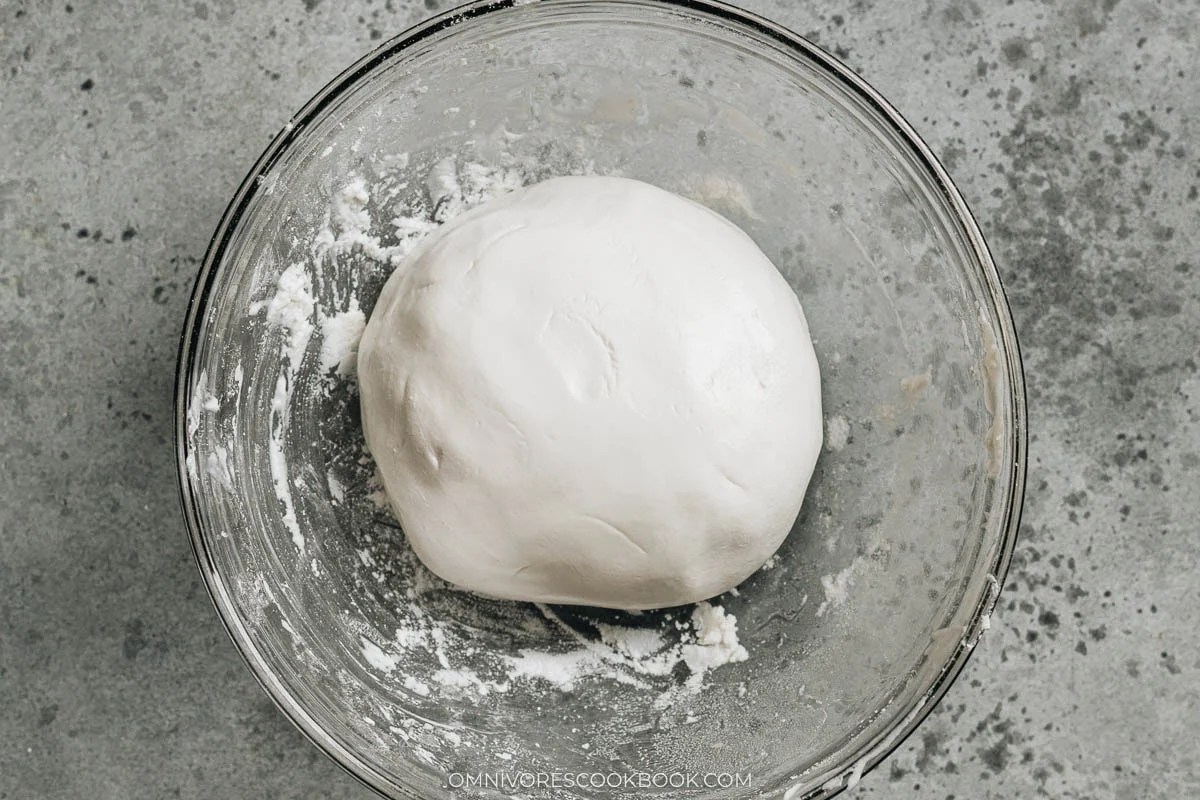
4. Knead: Shape the dough in the bowl for 1 to 2 minutes, until it is smooth and hydrated throughout.
5. Divide the dough: Lightly dust the work surface with glutinous rice flour and transfer the dough onto it. Divide the dough in half, roll each half into an even log, then cut each log into 6 equal pieces of about 42 grams each. Roll each piece into a smooth ball and cover with a damp towel while I shape the rest.

6. Prep the sesame seeds: Spread the sesame seeds in a medium-sized bowl and keep it next to the work surface.
7. Wrap the cakes: Place one dough ball in my palm and flatten it into a round disk about 2 1/2 inches wide and 1/4 inch thick. Place one portion of red bean paste in the center.
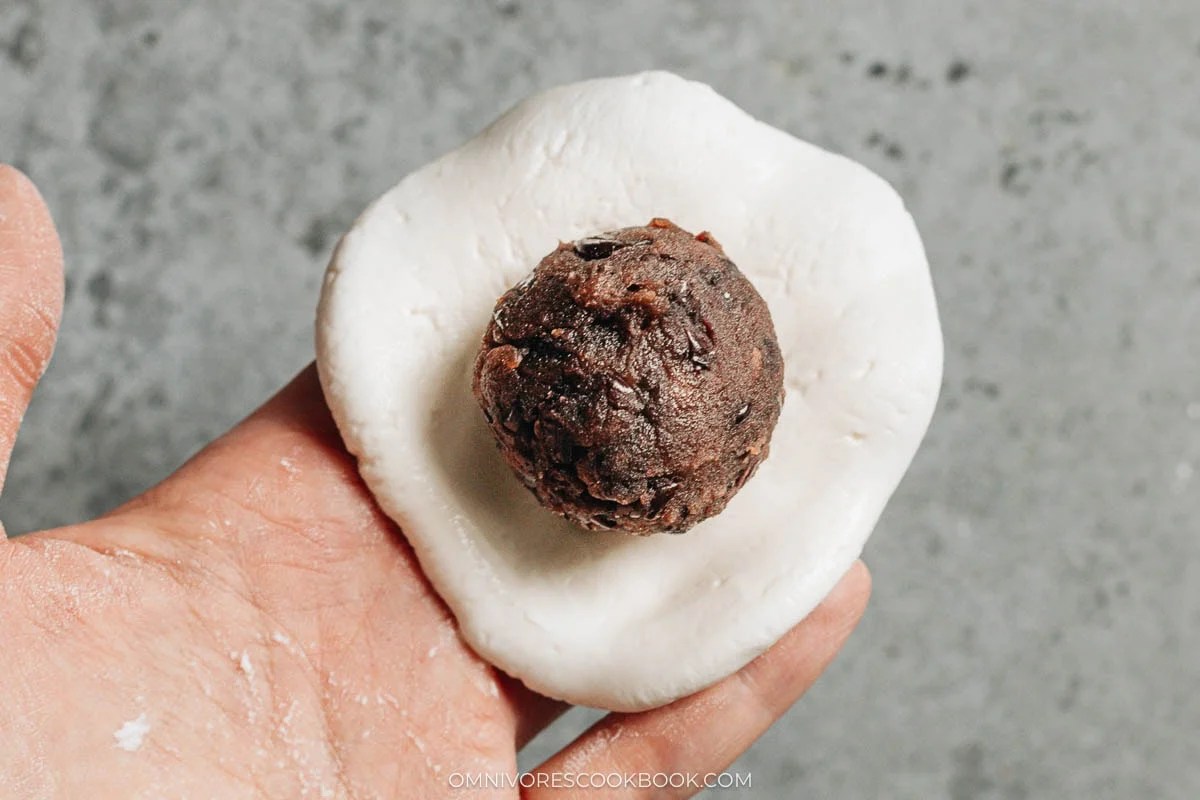
8. Gather and pinch the edges of the dough up and over the filling to enclose it completely, then roll the sealed cake into a smooth ball.

9. Coat with sesame: Flatten the ball with my palm into a disk about 3 inches wide and 1/2 inch thick. Press one side of the disk into the sesame seeds to coat and shake off the excess.

10. Get them ready: Transfer to a baking sheet and repeat with the remaining dough and filling.

11. Pan-fry the rice cakes: Pour enough oil into a medium nonstick skillet to lightly coat the bottom, and heat over medium heat until shimmering. Working in batches, add the rice cakes with the sesame-seed side facing up. Cook until the bottom is lightly golden, about 2 minutes. Flip the cakes and reduce the heat to medium-low. Cook until the sesame seeds are lightly golden, about 1 minute. Flip once more and cook until the first side is golden and crisp, 1 to 2 minutes more.

13. Finish and serve: Transfer to a plate lined with paper towels to soak up excess oil and repeat with the remaining rice cakes. Serve warm.

My Cooking Tips
Keep the shaped cakes covered: Rice dough dries out quickly on the counter and it will cracks when you try to flatten it. I keep the dough balls under a damp towel while I shape the cakes to prevent them from drying.
Add the water gradually, not all at once: Glutinous rice flour hydrates differently depending on the brand and the humidity in the kitchen. Pouring in 4 to 5 small additions and stirring after each one gives me control over the dough texture, and I stop as soon as the flour comes together into a soft-clay consistency, even if I have not used all the water.
Test the dough by lifting it: The right consistency lightly sticks to the bottom of the bowl when I pull the dough up, but it does not stick to my hands.
Do not worry about a perfect seal: If the dough does not quite cover the filling when I pinch the edges together, I stretch the thinner spots with my fingertips until they meet. It is fine if some areas are thinner than others or if the red bean paste is faintly visible through the dough.
Watch the sesame-coated side carefully during cooking, as the sesame seeds can burn quickly. I like to cook the uncoated side first until the rice cake is nearly cooked through, then reduce the heat before flipping it to cook the sesame-coated side. This gives the center time to finish cooking without scorching the sesame seeds. Cook the sesame seeds until just lightly golden for a mild, nutty flavor, or let them brown a bit more if you prefer a deeper, toastier taste.
Serving Suggestions
I serve these rice cakes warm off the pan, either with a pot of tea in the afternoon or as a dessert after a Chinese dinner. For Mid-Autumn Festival I love serving these alongside a plate of my black sesame filled Cantonese mooncake and a round of snow skin mooncake with custard filling so the dessert board has three shapes and three textures without a full baking project. My favorite pairing is a warm pot of Chinese jujube tea, which cuts the sweetness of the red bean paste and sets the mood for an afternoon tea.
Frequently Ask Questions
My dough is too sticky, what do I do?
Sticky dough usually means too much water or a flour that hydrates faster than expected. I mix in more glutinous rice flour a tablespoon at a time and knead briefly between each addition until the dough releases from my hands but still lightly sticks to the bottom of the bowl. Once it reaches the soft-clay texture, it wraps the filling easily and does not tear.
Why did my sesame seeds burn?
Sesame seeds burn easily in a hot pan and they toast much faster than the dough cooks through. Starting sesame-side up in the pan lets the plain side pick up color and the cake cook through, and the sesame side gets a short, low-heat toast at the end. I also reduce the heat to medium-low when I flip to the sesame side, which gives me more room for error.
How long do the cakes keep in the fridge and freezer?
I store leftover cakes in an airtight container in the refrigerator for up to 3 days or in the freezer for up to 1 month. Reheating is important because the dough turns tough when chilled and does not taste right straight from the fridge. I warm the cakes in a nonstick skillet over medium-low heat until heated through, which softens the chewy interior and crisps the surface again.
Want to Save This Recipe?
Enter your email below & we’ll send it to your inbox. Plus get great new recipes from us every week!
My sticky rice cake with red bean paste recipe is a Chinese pan-fried dessert with a soft chewy glutinous rice dough wrapped around a sweet red bean paste filling and pressed into sesame seeds, ready to eat with tea in 40 minutes. This is one of the easiest Chinese pastries a home cook can make because the dough is similar to soft clay and does not need any resting time.
Prevent your screen from going dark
Make the dough
Add the glutinous rice flour to a large bowl. Gradually add the water in 4 to 5 additions, stirring with a fork after each addition until the water is fully absorbed. Once all the water has been added, there should be no dry flour remaining and the mixture should come together into a soft, pliable dough that is not sticky or runny.
If the dough feels too soft to handle, mix in more glutinous rice flour, 1 tablespoon at a time. Knead the dough in the bowl for 1 to 2 minutes, until smooth and evenly hydrated. The finished dough should be soft and easy to shape like soft caly. It may lightly stick to the bottom of the bowl when lifted, but it should not stick to your hands.
Assemble
Lightly dust a work surface with glutinous rice flour and transfer the dough onto it. Divide the dough in half. Roll each half into an even log, then cut each log into 6 equal pieces (about 42 g each). Roll each piece into a smooth ball and cover with a wet towel while you shape the cakes.
Spread the sesame seeds in a medium sized bowl.
To make the cake, Place one dough ball in your palm and gently flatten it into a round disk about 2 1/2” (6 cm) wide and 1/4” (5 mm) thick. The dough is very pliable, so you can easily shape it with your hands without using a rolling pin.
Place one portion of the red bean paste in the center. Gather and pinch the edges of the dough together to completely enclose the filling (*Footnote 3), then gently roll it into a smooth ball.
Flatten the ball with your palm into a disk about 3” (8 cm) wide and 1/2” (1 cm) thick. Press one side gently into the sesame seeds to coat, shaking off any excess. Transfer to a baking sheet or large plate and repeat with the remaining dough and filling.
Cook
Pour enough oil into a medium nonstick skillet to lightly coat the bottom. Heat over medium heat until shimmering.
Working in batches, add the rice cakes sesame seed-side up. Cook until the bottom is lightly golden, about 2 minutes. Flip and reduce the heat to medium-low. Cook until the sesame seeds are lightly golden, about 1 minute. Flip once more and cook until the first side is evenly golden and crisp, 1 to 2 minutes more.
Transfer to a plate lined with paper towels and repeat with the remaining rice cakes. Serve warm.
Store and reheat
Store the rice cake in the refrigerator for 3 days or in the freezer for 1 month. Thaw before reheating. Warm the rice cakes in a nonstick skillet over medium-low heat until heated through. This restores their soft, chewy interior while crisping the surface again.
Ingredient Substitution Guide
- Traditionally, these rice cakes are deep-fried until crisp. At home, I prefer shallow-frying them with just enough oil to coat the pan. The cakes are slightly softer than the traditional version, but they’re lighter and just as delicious.
- Sesame seeds brown much faster than the dough, so it’s important to cook the uncoated side first. This allows the cakes to puff slightly and cook through before the sesame seeds begin to toast. I like to cook the sesame-coated side until it’s just lightly golden, which gives the seeds a delicate nutty flavor. For a deeper roasted flavor, continue cooking until the sesame seeds are golden brown.
- If the dough doesn’t completely cover the filling, gently stretch and nudge the edges with your fingertips until they meet. It’s perfectly fine if some areas of the dough are thinner than others or if the red bean paste is faintly visible through the dough. Once flattened into a cake, it will cook up just fine.
Serving: 1cake, Calories: 230kcal, Carbohydrates: 39g, Protein: 3g, Fat: 6g, Saturated Fat: 1g, Polyunsaturated Fat: 3g, Monounsaturated Fat: 2g, Trans Fat: 0.03g, Sodium: 1mg, Potassium: 31mg, Fiber: 2g, Sugar: 17g, Vitamin A: 0.3IU, Calcium: 40mg, Iron: 1mg

Did you make this recipe?
I’d love to hear how it turned out for you! Please take a moment to leave a 5-star rating ⭐️ and share your thoughts in the comments further down the page. It really helps others discover the recipe too.
The nutrition facts are calculated based on 1 of the 12 cakes generated from this recipe.